Integrating a Self-Hosting Commenting System to Your Site
By David Xiao
TLDR;
👉 This post talks about hosting remark42 commenting system as Docker container; Leveraging Cloudflare to protect the remark42 endpoint; Integrating remark42 to a static site which is built on Hugo and academic theme.
Before getting started, take a look at the posts on my blog at davidxiao.me and see the way commenting works.
What Will be Covered in This Post
-
Deploy remark42 container on Docker
-
Protect your remark42 endpoint with Cloudflare CDN
-
Integrate remark42 to your Hugo site
Step 1. Deploy Remark42 on your Host
Remark42 is an open source commenting system that can be deployed as container. It’s self-contained with little external dependencies. You can find deployement guide on its Remark42’s git repo.
Feel free to do container your way but if you are interested in what tool I use for docker management, it’s Portainer.
I have the following parameters on my remark42 container:
REMARK_URL              make sure it has the full path if you are using reverse proxy and rewrites, e.g. https://api.davidxiao.me/remark42
SITE	                site id. For example: davidxiao
SECRET	                required. can be a long and hard-to-guess string
DEBUG	                true
AUTH_GOOGLE_CID         your own value
AUTH_GOOGLE_CSEC        your own value
AUTH_FACEBOOK_CID       your own value
AUTH_FACEBOOK_CSEC      your own value
AUTH_TWITTER_CID        your own value
AUTH_TWITTER_CSEC       your own value
AUTH_GITHUB_CID         your own value
AUTH_GITHUB_CSEC        your own value
ADMIN_SHARED_EMAIL      mail address that will receive notifications such as new comments
NOTIFY_EMAIL_ADMIN	    true
NOTIFY_TYPE	            email
NOTIFY_EMAIL_FROM	    mail address that is in the same domain see Mailgun settings. For example, mine is remark42@davidxiao.me
AUTH_EMAIL_FROM	        your own value
ADMIN_SHARED_ID	        OAuth authenticated user id that has admin access. see https://github.com/umputun/remark42#admin-users
SMTP_HOST	            smtp.mailgun.org
SMTP_PORT	            465
SMTP_TLS	            true
SMTP_USERNAME	        SMTP credential from Mailgun
SMTP_PASSWORD	        your own credential
For more detail on how to configure email configuration on Remark42, check this out.
App Registration on the OAuth Providers
Before registering you Remark42 app on google, facebook, twitter and github (the OAuth providers Remark42 supports), you would need to determine the domain name of your Remark42 api endpoint.

My app registration page on facebook as an example
DDNS(Dynamic DNS) comes in handy whether you are hosting Remark42 container on cloud such as AWS EC2 or on your homelab, since it allows you to update DNS A records whenever your endpoint IP changes.
Selecting a DDNS provider is important for a few reasons.
-
Protection of your host’s public IP is important for self-hosting web apps. Using DDNS alone means your domain name gets resolved to your public IP. DDNS + CDN is a better approach.
-
Each OAuth provider has its own rules over whether an given OAuth redirect URI is allowed. For example, facebook does not allow any
duckdns.orgas part of redirect URI at time of writing. -
Service availability concern. Your app will become inaccessible when the DDNS it relies on stops working.
-
The security posture of the DDNS provider. If the service provider gets compromised, you DDNS domain name can be “hijacked”.
My approach:
-
Set up your public endpoint leveraging a DNS provider such as Cloudflare that has large operating scale, supports DDNS management over API and offers CDN protection over your private endpoint. See here for more.
-
On your private endpoint, Use a reverse proxy such as Nginx to rewrite URLs so that multiple apps can be “tunneled through” a single domain name when needed. See here for more.
-
Use Nginx control policy to restrict access to only Cloudflare IPs and local trusted networks.
Step 2. Protect(tunnel) your Endpoint
You need to use Cloudflare as DNS provider before enabling Cloudflare CDN.
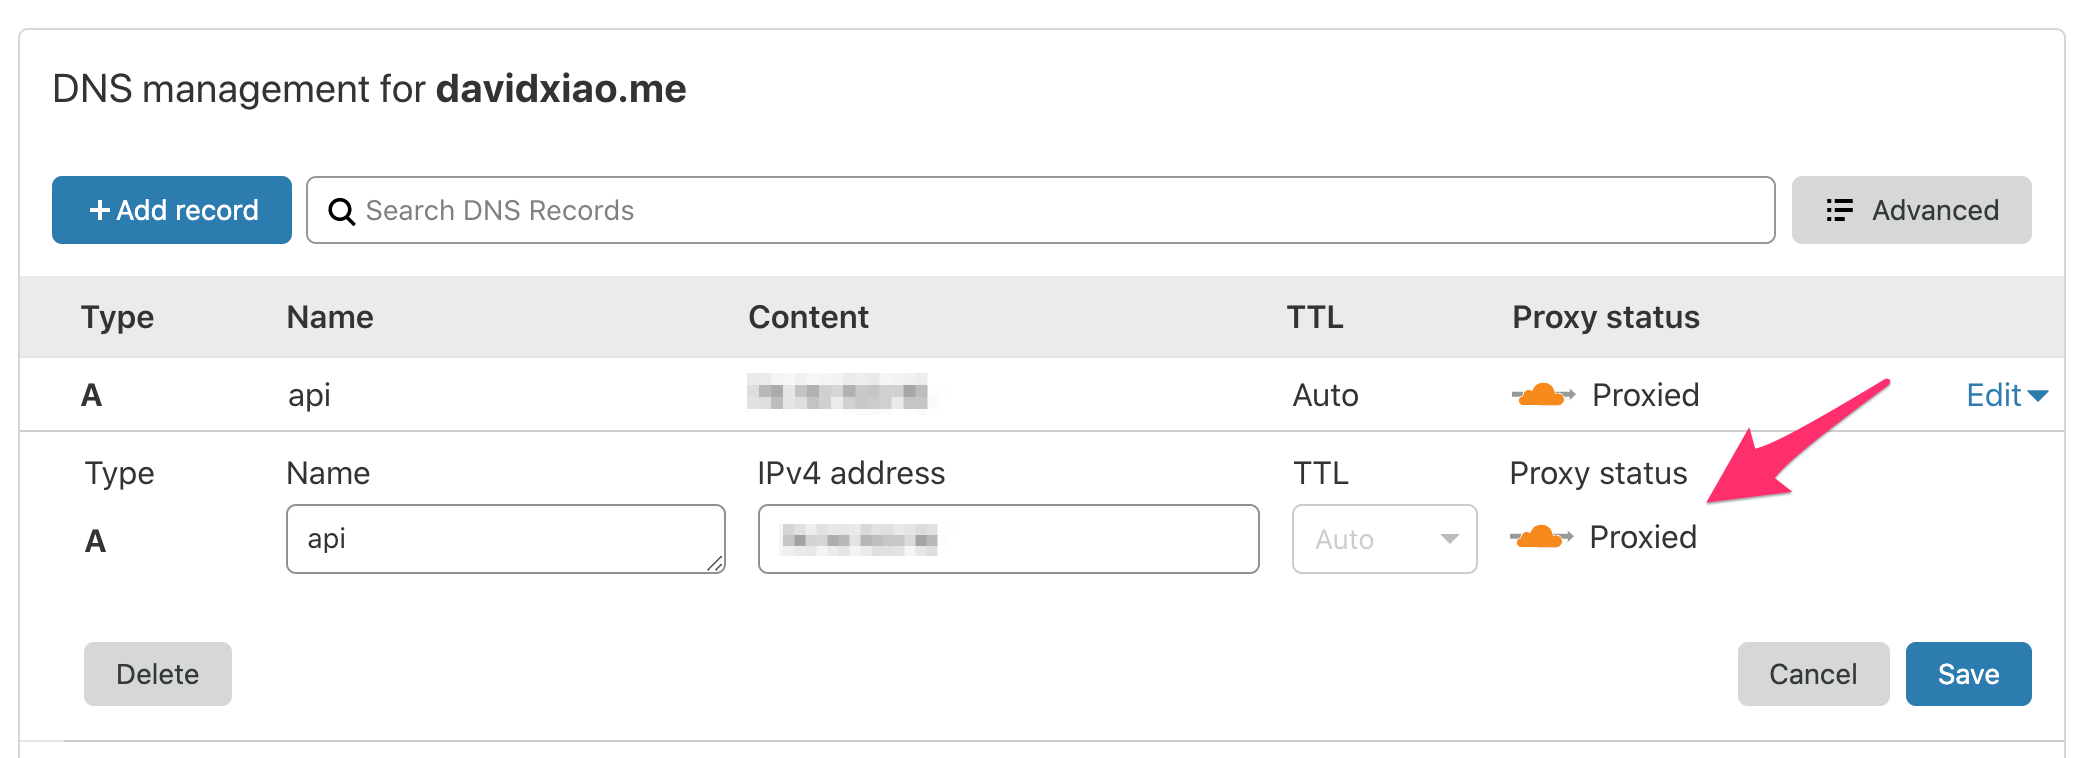
To enable CDN, first go to Cloudflare portal and enable CDN for your remark42 subdomain. In my case it’s api.davidxiao.me.

Enabling Proxy by clicking on the Proxy status icon
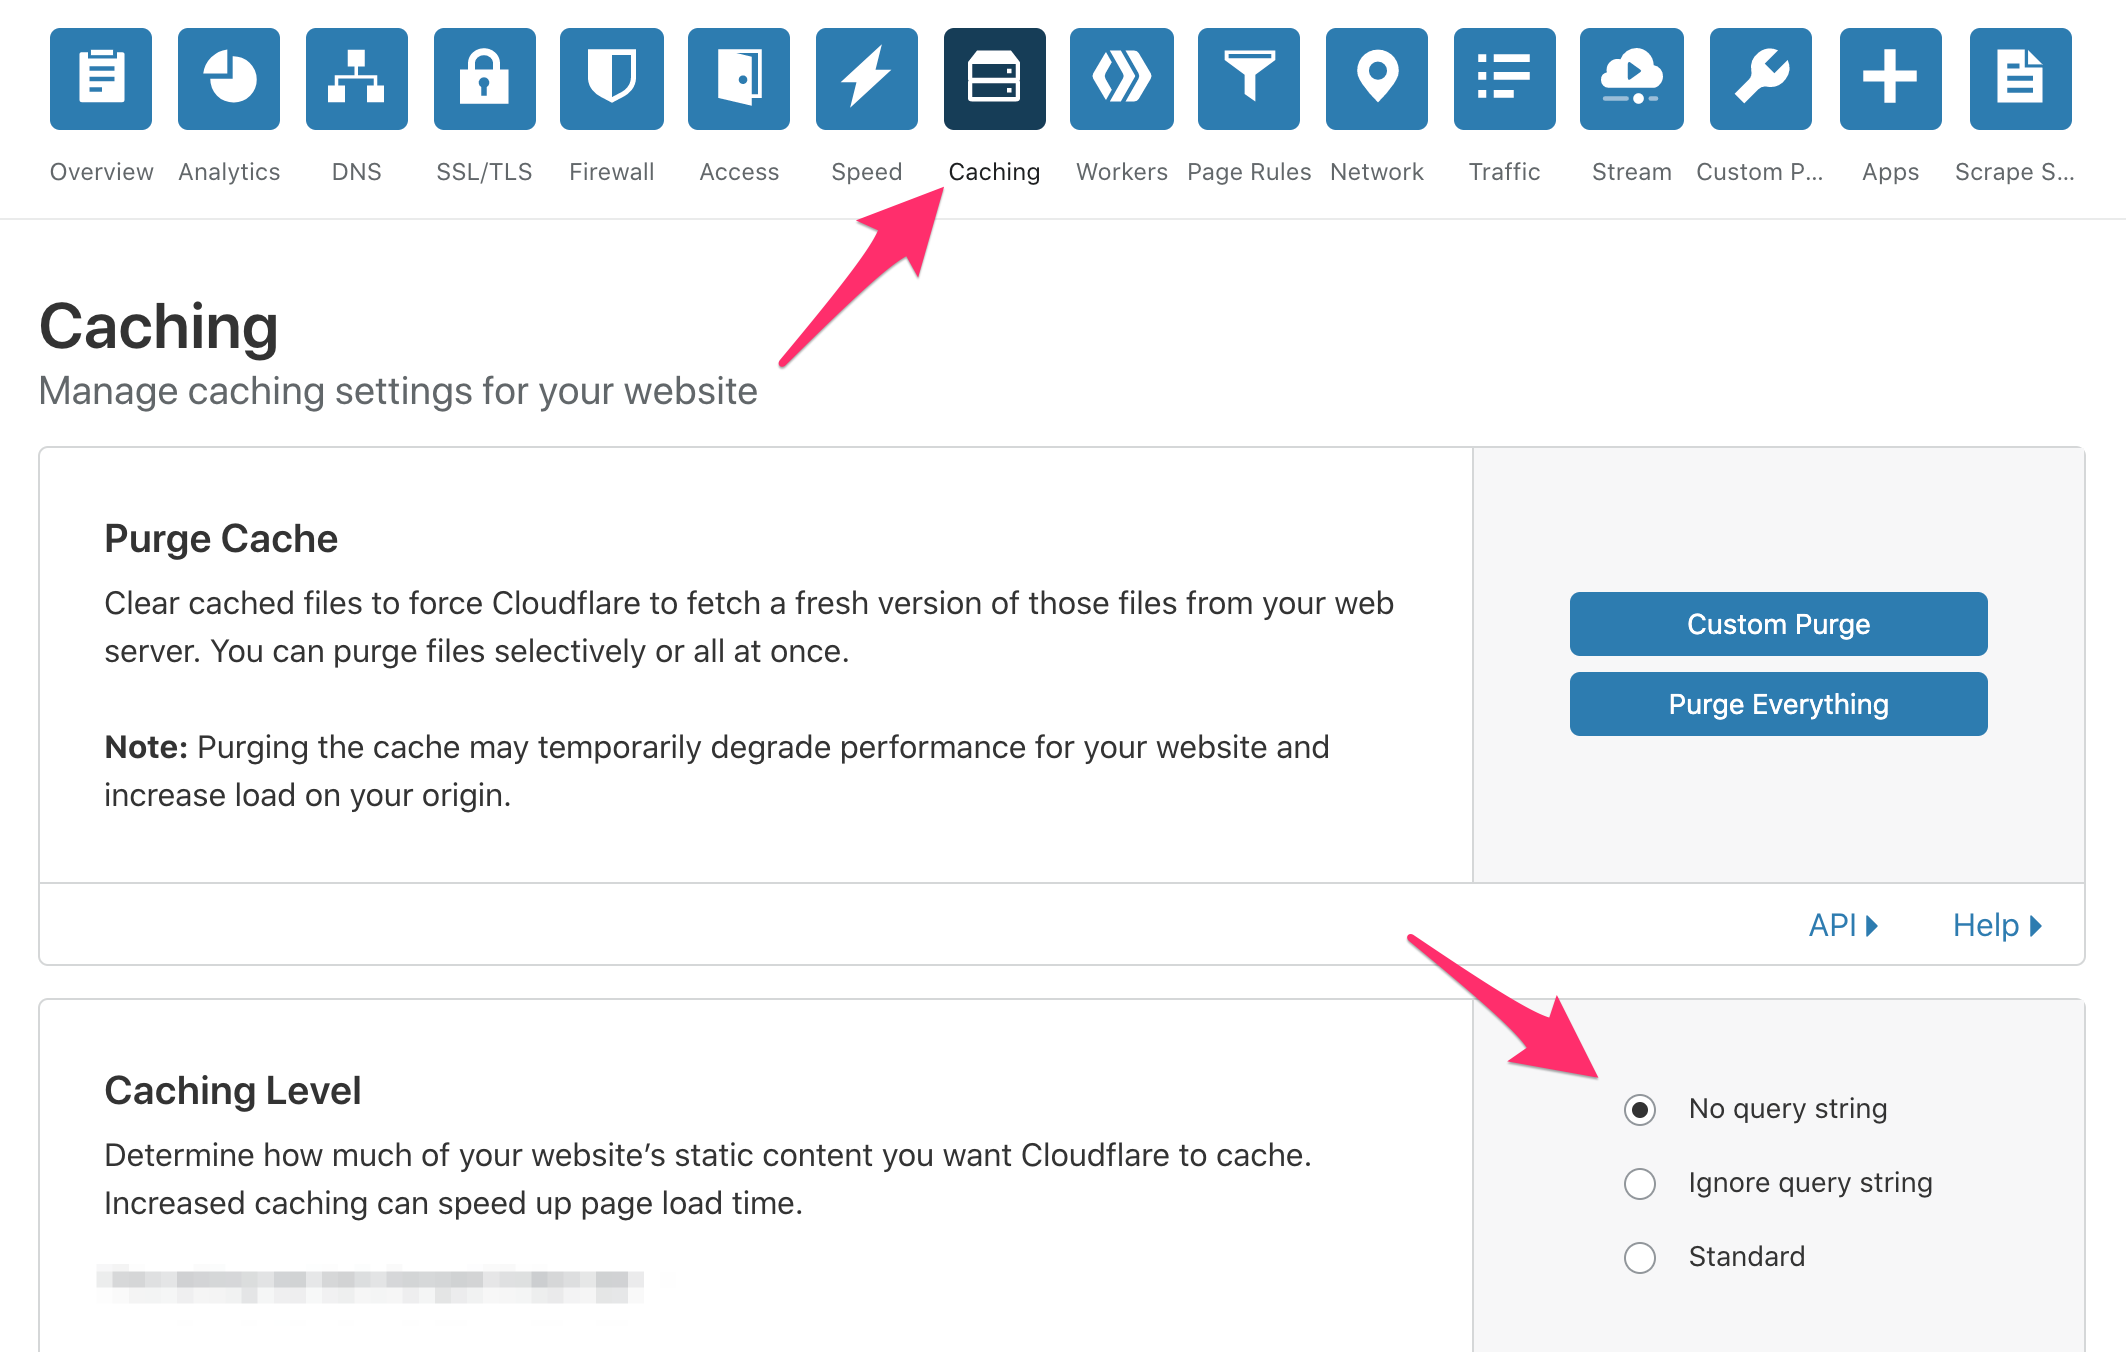
Second, modify caching level to “No query string”. No Query String means it only delivers files from cache when there is no query string. It’s the caching behavior we expect for an API endpoint, isn’t it?

Enabling Proxied by clicking on Proxy status icon
Step 2.1 Enable End-to-end HTTPS with Cloudflare
There are several SSL options provided by Cloudflare. Check this out to understand the difference.
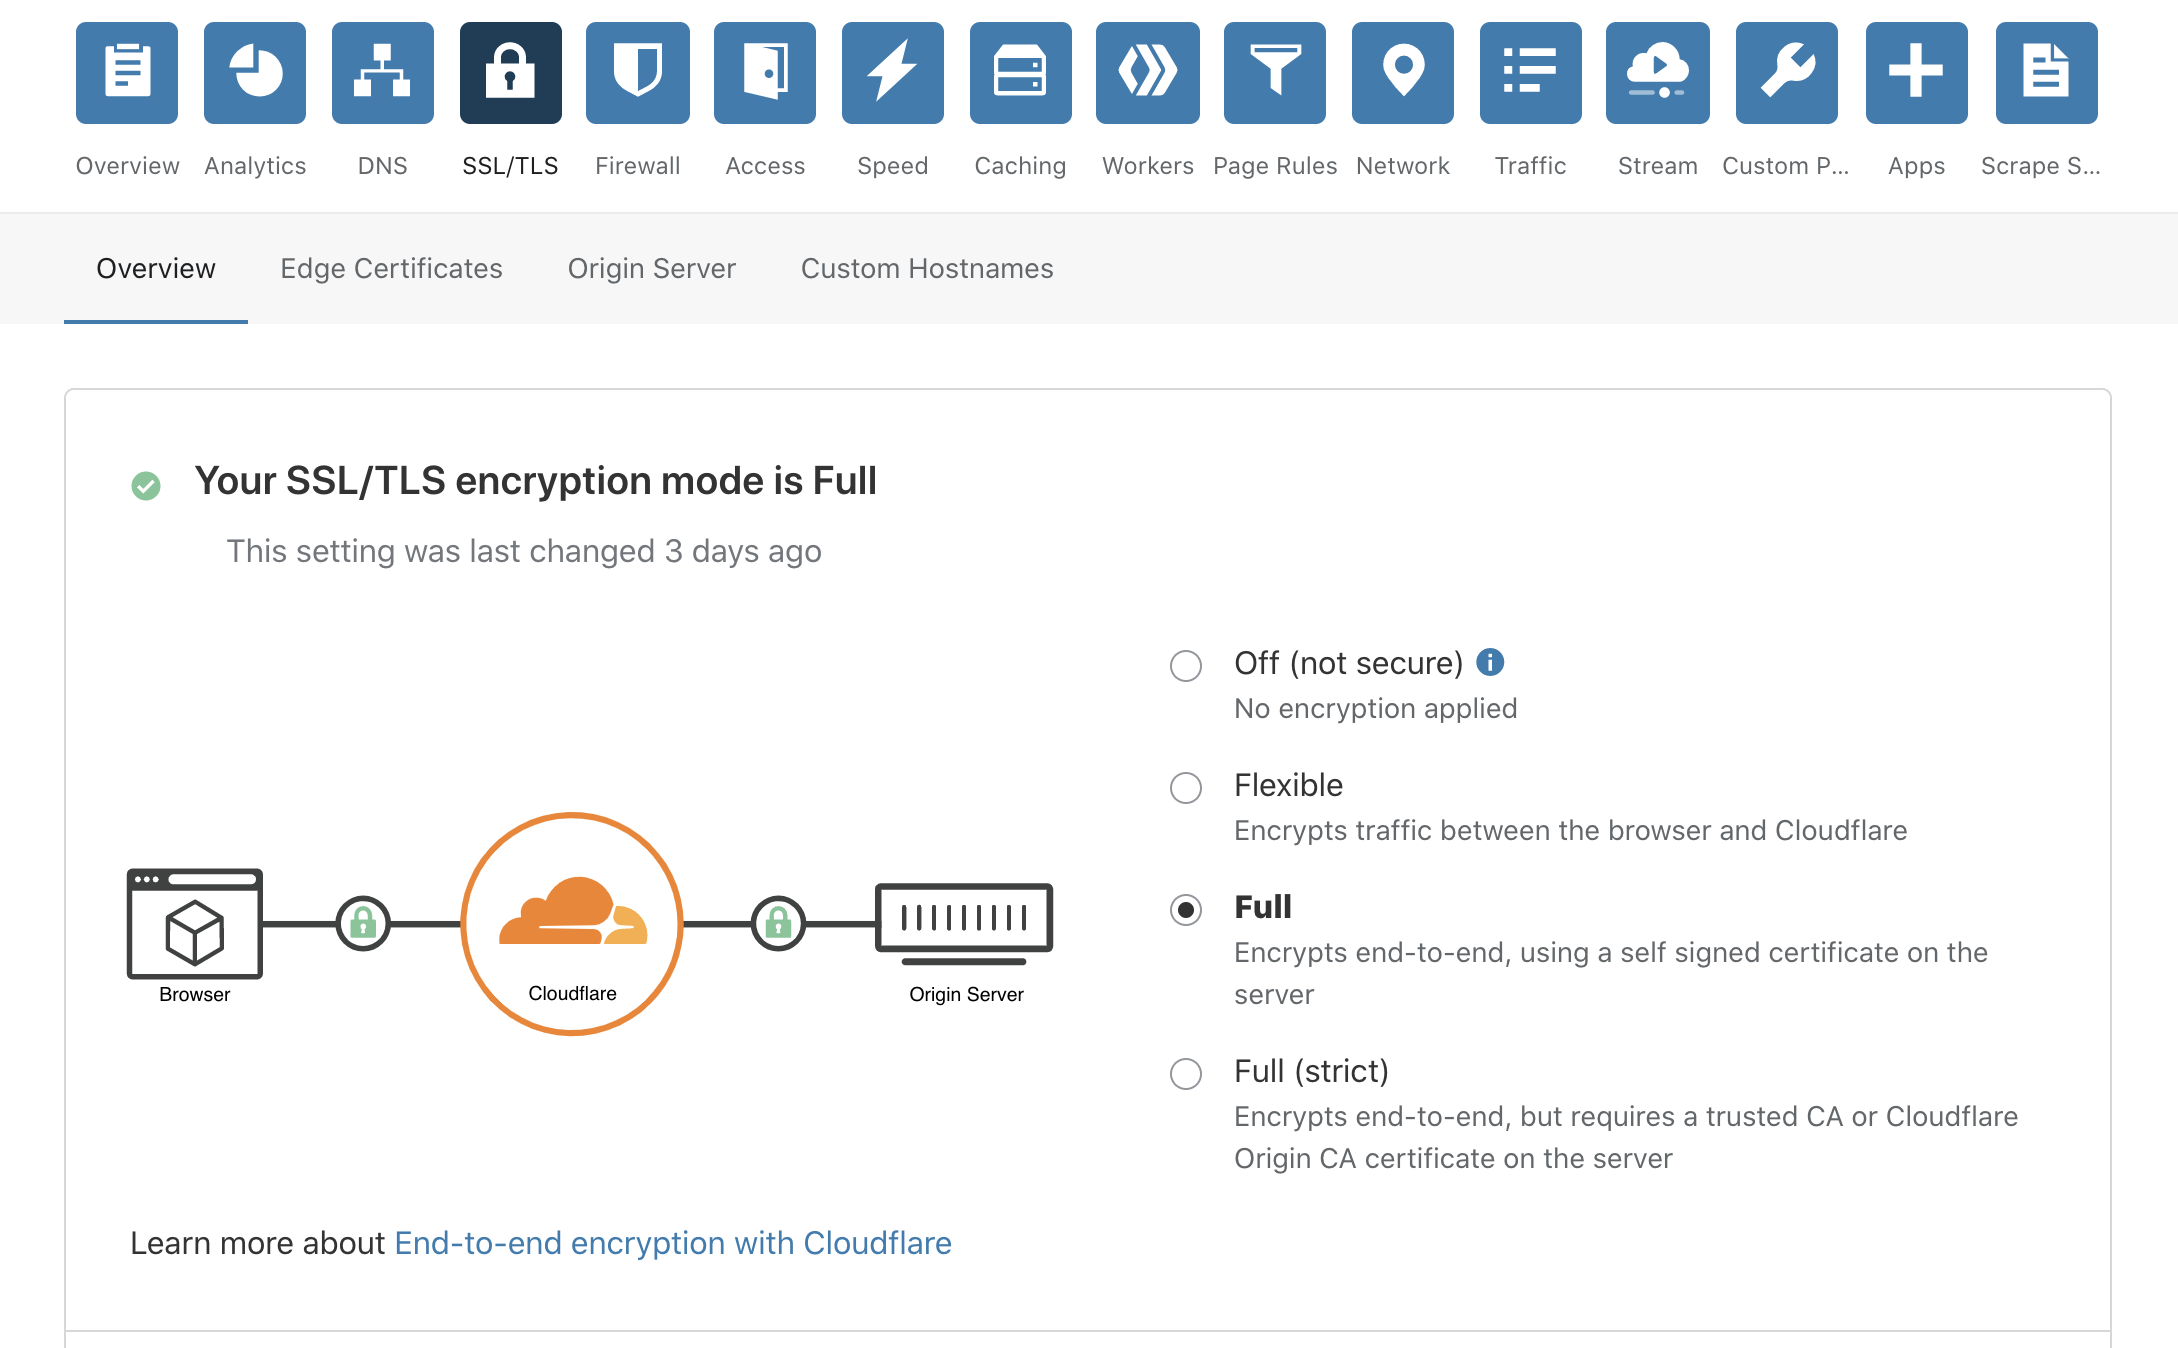
Based on my own needs, I’ve set up a “Full” mode in Cloudflare, which ensures a secure connection between both the web browser and Cloudflare and between Cloudflare and my endpoint. This option uses a self-signed certificate at the my endpoint web server.

Enabling SSL in Full mode

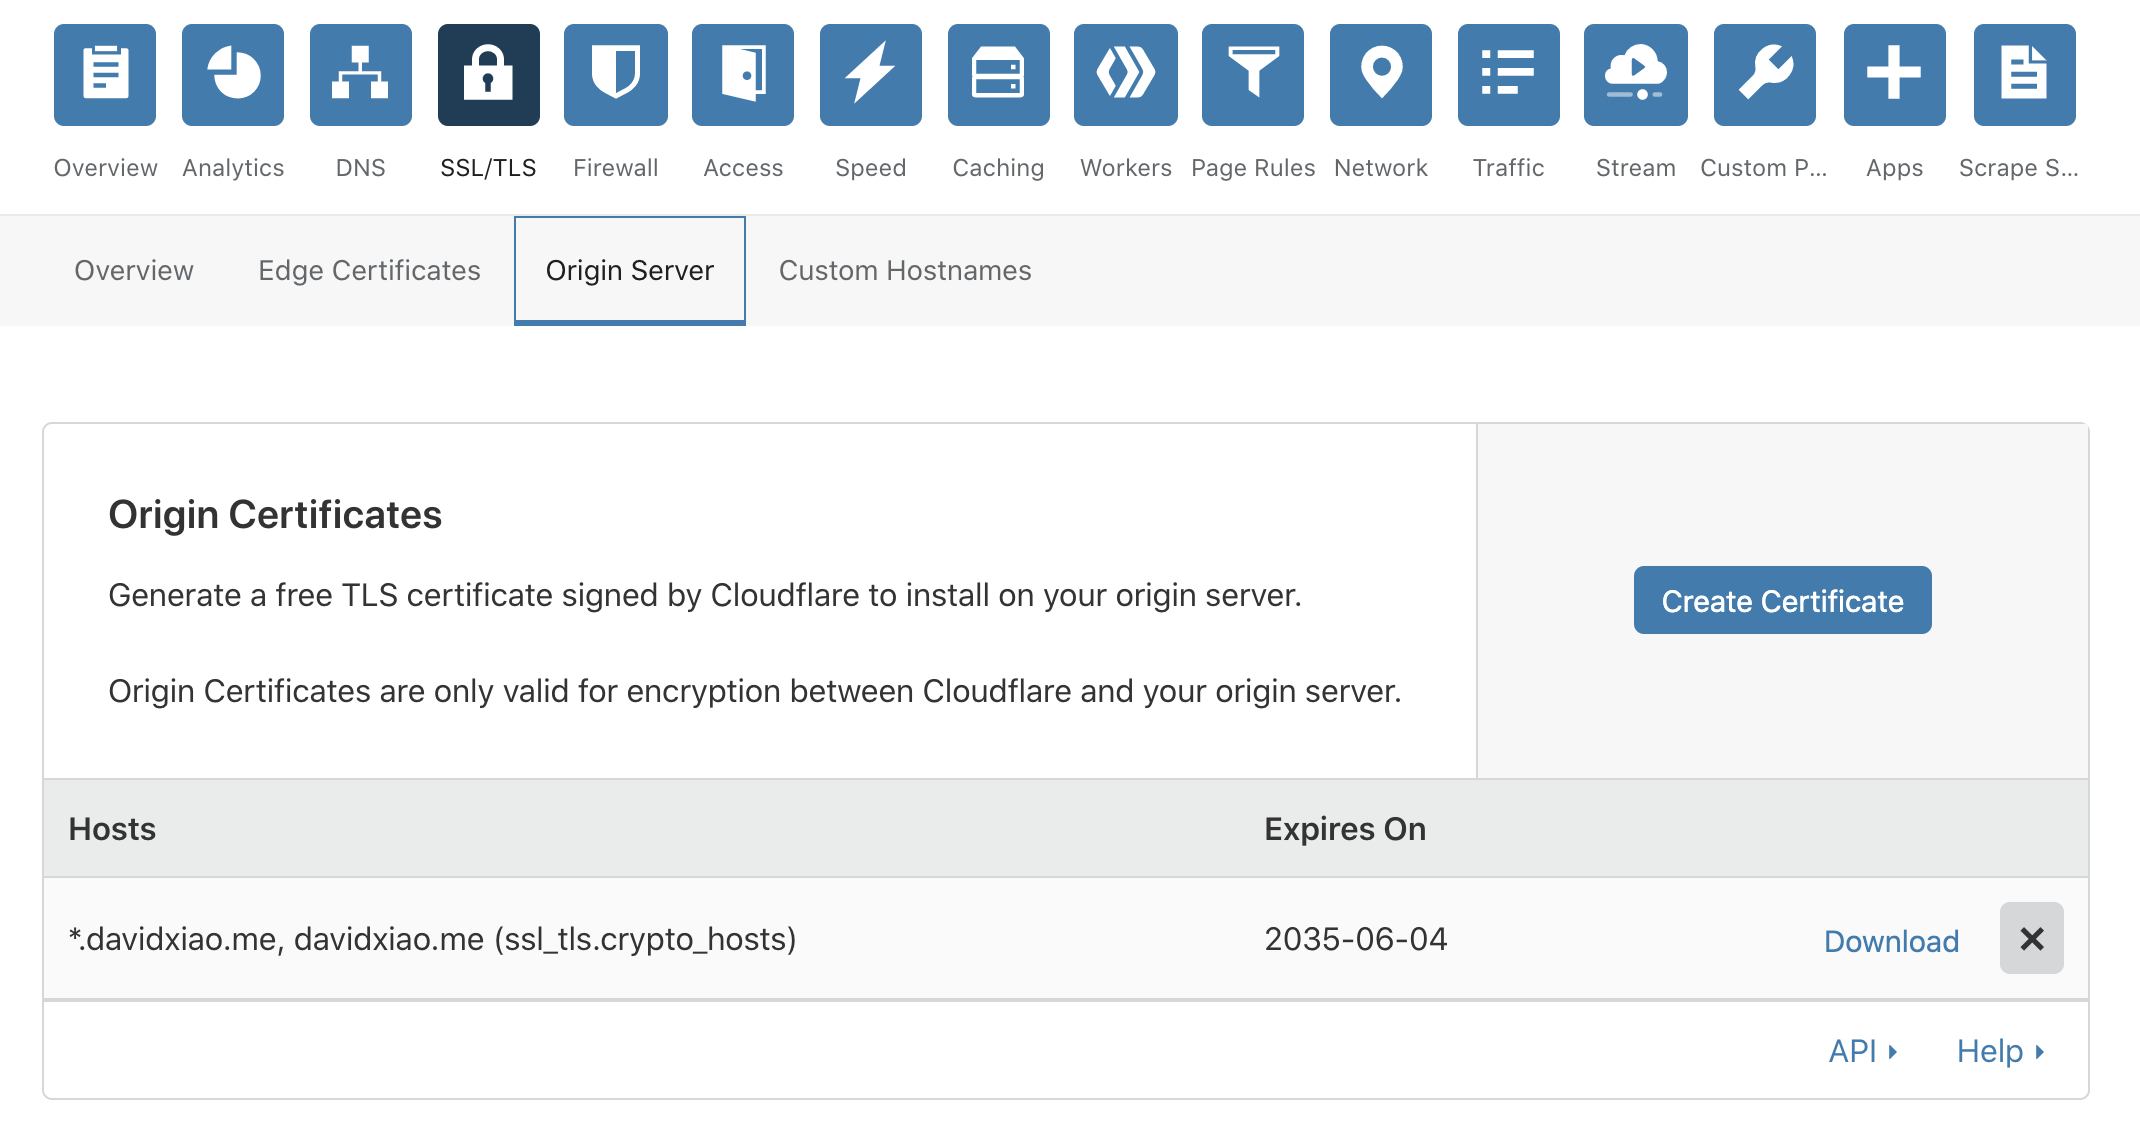
Generate and download Cloudflare's self-signed certificates
Save the origin certificat as origin-cert.pem and the private key as priv.key, place both files on your host and make sure they both have ownership of root and have 0600 permissions.
Then you just need to add the file locations in your nginx configuration file. See below my configruation files for example:
Step 3. Integrate Remark42 to Your Hugo Site
Override the comments.html template by:
$ cp your-project-root/themes/academic/layouts/partials/comments.html your-project-root/layouts/partials/comments.html
and modify the new one as you see fit.
The following is my modified version of comments.html.
Conclusion
Congrats! You’ve got the remark42 commenting system integrated to your Hugo site.
Comments and Feedback are welcome!